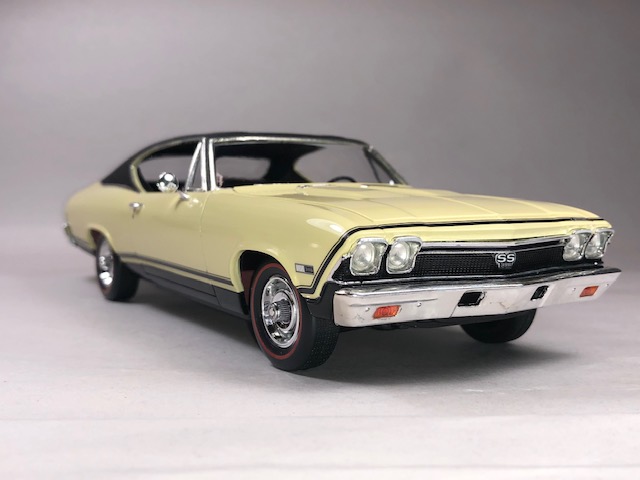
The 1968 Chevelle received an all-new distinctly sculpted body with tapered front fenders and a rounded beltline. The car also adopted a long-hood, short-deck profile and a high rear-quarter “kick-up”. The public responded well to this new design by selling a total of 464,669 units, 62,785 of them being equipped with the SS396 L78 package.
Revell’s all new 68 Chevelle comes complete with 201 parts, molded in white with chrome, clear and red transparent parts. An impressive decal sheet provides 3 color choices for the side accent stripe (red, white, black) along with gauge and under hood details. Revell also includes some nice pad printed red line tires. The body is nicely molded in white with very little clean up required before going to paint. I felt that the panel lines were a bit shallow for the doors and trunk and decided to deepen them with a scriber. I would recommend deepening the lines to avoid filling them in with paint. Also, the right and left taillight housings are separate from the body. I chose to glue them to the body and re scribe the panel lines before painting. This decision worked out well, causing no issues during final assembly as well as not having to worry about trying to glue them into place after a fresh paint job.
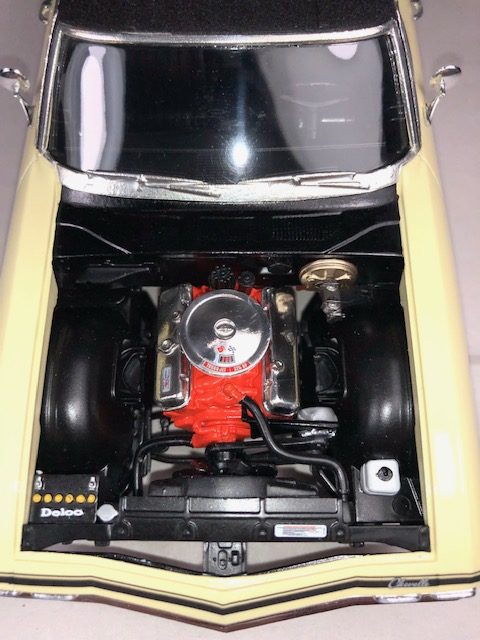
The engine consists of two engine halves with the transmission molded into the block and a separate oil pan eliminating that pesky seem running down the center. The valve covers; fuel pump and carburetor are chrome plated. I would recommend stripping the chrome off the carburetor and fuel pump and finishing them in a metallizer or paint equivalent to make them appear more realistic. Other parts for the engine include an alternator with bracket, fan belt and pulley assembly, fan clutch; separate water pump, coil and distributor. Once assembled, it builds up into a nice representation of the Chevrolet L78 396ci.
Revell chose to mold the frame separately from the interior floor pan. It makes detailing the chassis and floor pans much easier if you choose to do the primer with body overspray effect as I chose to do. The front fenders are also molded into this assembly. Careful masking will need to be done to protect the fenders, interior floor and floor pans if painting multiple colors, but the results are well worth it.
The interior consists of 11 separate pieces including separate door panels, front and rear seats, dash, steering wheel and column, shifter and center console. The interior assembles easily and I didn’t discover any fit issues. There were some small gaps on the left and right side of the rear seat where it meets the door panels. I was concerned at first, but after installing the interior into the body, they are unnoticeable. I thought the option of black and white shift pattern decals was a nice touch to add to the shifter. Full instrumentation decals are also included for the gauges.
Final assembly was a breeze. I did have to carefully shave the top of the firewall to get the chassis assembly to fit properly in the body, but overall that was the only challenge I found. The front and rear windshields are crystal clear warp free and fit perfectly into the recessed areas of the interior. Once completed, the model sits nice and level and represents the 1:1 car well. I chose to add a black vinyl top with Rust-O-Leum textured paint and finished the body in GM Butternut yellow courtesy of MCW finishes. Overall, I would recommend this kit to everyone from beginners to veteran model builders. This kit assembles well, it’s almost nonexistent of flash, parts fit are great and it was a lot of fun to build.
Mike Hackey – ACME


